

You've got a Firestick plugged in, a hockey game starting soon, and a subscription page promising 4K IPTV in large letters. The remote works, the channels load, but the picture looks softer than expected and the game stutters just as the house gets busy. That gap is rarely about one thing. It's the Firestick model, the TV, the Wi-Fi band, and how many screens are running at once, all acting together.
If you're shopping for IPTV Firestick Canada options, I would test that whole chain before you judge any plan by its channel list. A player app can't output a resolution the stick can't decode, and a strong daytime speed test won't tell you what happens at 9 p.m. when someone starts a game download in the next room. Work through the model, bandwidth, installation and rights checks in order, and you'll know whether a problem sits with the device, your network or the service itself.
Table of Contents
- Firestick Models and the Picture Quality Each One Delivers
- Bandwidth Each Stream Needs in a Busy Home
- How to Install IPTV on Your Firestick Step by Step
- Fixing Buffering and Common Firestick IPTV Problems
- Checking Sports Games and Live Feed Rights
- Checking Terms, Connections and Canadian Provider Rules
- Test Your Setup Before You Subscribe
Firestick Models and the Picture Quality Each One Delivers
Most current Fire TV Sticks run common IPTV player apps, but the model sets the picture ceiling. Check yours before you pay for a 4K plan, because no setting inside the player will lift an HD stick past HD output.
What Each Current Model Can Output
The Amazon Canada Fire TV Stick HD listing lists the Fire TV Stick 4K, 4K Plus and 4K Max as supporting 4K Ultra HD, while the Fire TV Stick HD is limited to 1080p, the listed models support Wi‑Fi 6, and the 4K Max supports Wi‑Fi 6E. That same listing identifies a high-speed HDMI input as a system requirement, so the TV port matters as much as the stick.
| Model | Maximum output | HDR formats | Wi-Fi standard |
|---|---|---|---|
| Fire TV Stick HD | 1080p, 720p at up to 60 fps | – | Wi-Fi 6 |
| Fire TV Stick 4K | 3840 × 2160 (4K UHD) | HDR10, HLG | Wi-Fi 6 |
| Fire TV Stick 4K Plus | 3840 × 2160 (4K UHD) | HDR10, HLG | Wi-Fi 6 |
| Fire TV Stick 4K Max | 3840 × 2160 (4K UHD) | HDR10, HLG | Wi-Fi 6E |
If you're also weighing the hardware itself, a streaming stick review for gadget shoppers can help you compare the remote, interface and everyday handling before you buy. Use it for the device decision, then use your own TV and network to judge IPTV playback.
The Chain That Has to Agree
A 4K label produces 4K only when every link supports it. The source encoding, the IPTV player, the Firestick decoder, the high-speed HDMI connection and the TV panel all have to match. If one link falls back, you'll see HD even though the plan says 4K.
The codec list on a spec sheet works the same way. A stick may support a format on paper while the player app never exposes it, and HDR modes can stay dormant on a TV that doesn't ask for them. Test a 4K channel and an HDR sports broadcast on your own setup instead of trusting the label. And the chain doesn't end at the panel: a stick that decodes 4K cleanly will still stutter on a crowded Wi-Fi band, which is why the model check comes before the bandwidth check.
Practical rule: Match the Firestick display output to your TV, keep firmware and the player current, and test during the evening peak.
Before you go further, write down three things. Note the Firestick model number, confirm your TV resolution, and check whether the HDMI port you're using is high-speed. Those three answers decide what any subscription can realistically deliver in your living room.
Bandwidth Each Stream Needs in a Busy Home
One 4K stream playing alone on a quiet Tuesday afternoon proves almost nothing. The test is dinner time, when the living room Firestick, the bedroom TV and a tablet all pull from the same router at once.
Resolution drives most of the load. Treat the figures below as typical planning ranges, since every service encodes its streams a little differently and the bitrate rises and falls within a single show.

Bandwidth Needed for Common Stream Setups
| Stream setup | Estimated bandwidth | Planning note |
|---|---|---|
| One 720p stream | Roughly 2 to 4 Mbps | Basic HD on a secondary screen |
| One 1080p stream | Roughly 4 to 8 Mbps | Standard HD for most living rooms |
| One 4K UHD stream (HEVC) | Roughly 12 to 20 Mbps | Needs steady throughput for the whole stream |
| Two simultaneous 4K UHD streams | Roughly 24 to 40 Mbps | Family dinner-hour setup |
| One 4K, one 1080p and one 720p stream | Roughly 18 to 32 Mbps | Mixed household at peak time |
Say your home runs a 4K living room Firestick, a 1080p bedroom TV and a tablet on a 720p feed. That combination lands somewhere around 18 to 32 Mbps before anything else touches the network. Two 4K TVs during dinner can push toward 40 Mbps from the streams alone.
Why the Total Is Only the Starting Point
Per-stream estimates set the floor for your plan. Live sports with fast motion are less forgiving than a drama episode, and a stream that spikes mid-play will stutter on a connection sized to the last megabit. Leave headroom.
Adaptive playback also changes what you see. When available bandwidth drops below the target rate, the player usually lowers picture quality before it stalls completely. A game that suddenly looks soft, then recovers, is often adapting rather than failing outright.
The speed printed on the bill is only one link in the chain. A Firestick at the far end of the house from the router, or one sharing a crowded evening band, can starve a plan that looks generous on paper. If a speed test beside the router looks fine while the living room IPTV stream buffers, the weak link is the path inside the house.
Other traffic uses the same headroom. Video calls, game downloads, cloud backups and another person streaming all compete with your Firestick. Add up the streams you expect at your busiest hour and compare that total with the evening speed your plan delivers, which is usually lower than the advertised maximum.
How to Install IPTV on Your Firestick Step by Step
Installation goes smoothly when you prepare the device first and type your details carefully. ROVE IPTV provides step-by-step installation guides for all major devices, including Firestick, Google TV, and Apple TV, and step-by-step IPTV setup instructions are provided with every subscription, backed by 24/7 customer support. Use the player and link named in your provider's guide rather than an unnamed app from an unofficial site.
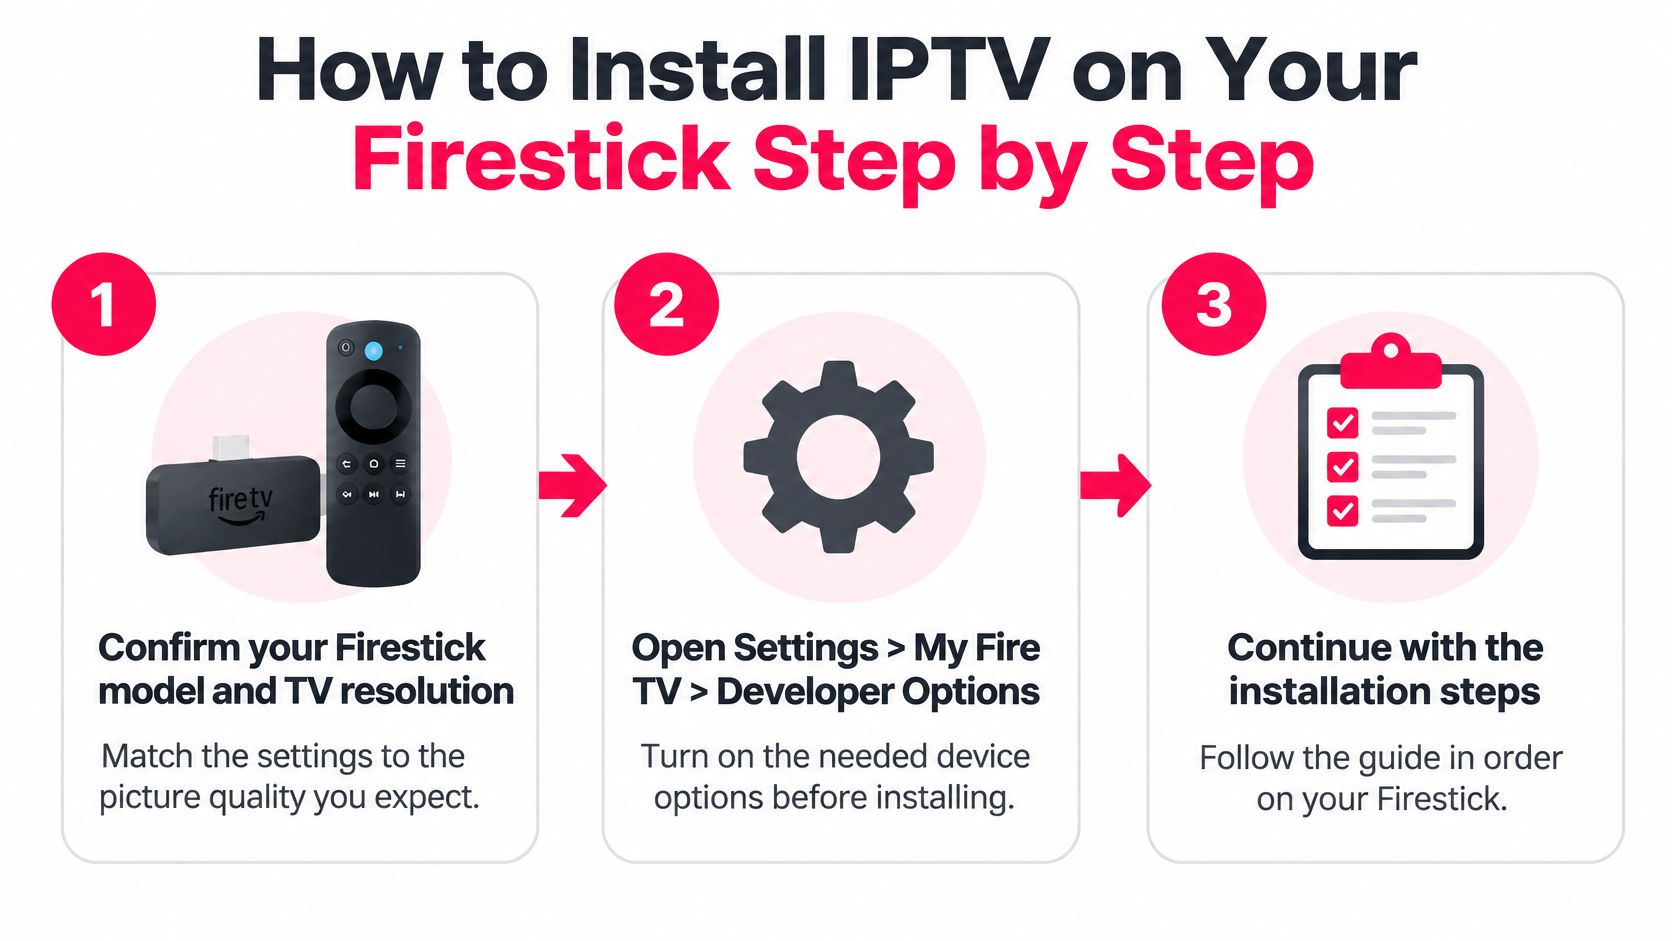
The Seven Setup Steps
- Confirm your hardware first: Check your Firestick model and TV resolution so your settings match the picture quality you expect. This prevents you from troubleshooting a 4K problem that is really an HD hardware limit.
- Open the developer settings: Go to Settings, select My Fire TV, then Developer Options, and turn on Install unknown apps for the tool you plan to use. Fire OS blocks apps from outside its store by default, which is why this step exists.
- Install the transfer tool and player: Install a file-transfer tool such as Downloader from the Amazon Appstore, then install the IPTV player app named in your provider's Canadian setup guide. Installing a similarly named app from a random site is the common slip here.
- Enter your subscription details slowly: Open the player and enter the username, password or playlist link from your subscription exactly as provided. A stray space or one mistyped character is the usual cause of a login failure, so recheck each field before you submit it.
- Let the guide finish loading: Load the program guide and wait several minutes for the channel list to populate. Don't open Live TV and judge the service while categories are still filling in, because an unfinished guide can look like missing channels.
- Test three different things in the evening: Try one general channel, one video-on-demand title and one live sports channel during the evening. Daytime tests hide congestion, so they can make a weak setup look better than it is.
- Match the display to the TV: Set the Firestick display output to your TV's resolution and turn on HDR only if the TV supports it. Forcing a mode the panel can't use creates problems you then have to undo.
What Success Looks Like
You'll know the setup worked when channels appear in clear categories and the guide shows programme times. A live channel should start within a few seconds, and changing channels shouldn't send you back to a blank screen. If one of those checks fails, note which step you were on, because that detail helps support pinpoint whether the fault is the login, the playlist or the device setting.
Fixing Buffering and Common Firestick IPTV Problems
The common mistake is blaming the provider first when the home network is the bottleneck. A Firestick tucked behind a TV, on a crowded band, at the busiest hour can make a sound service look unreliable. Judge the whole chain together: Stick model, TV input, router placement, band and household load. Work from the device outward, then the network, then the provider, and change one setting at a time.
Headline package speed is a different measure from what one stream needs at 9 p.m. A plan can look generous while latency, packet loss or Wi-Fi congestion still cause buffering, especially on fixed-wireless connections in rural homes where busy-hour performance can shift. Treat 4K as a steadier, higher-capacity demand than HD and compare it with the per-stream figures in the bandwidth section, not with the number printed on the internet plan. If evenings are your problem, our guide to why IPTV keeps freezing during busy hours walks through that pattern in more depth.
A Four-Step Evening Diagnostic
- Compare Ethernet and Wi-Fi: Run a speed test on the Firestick over Ethernet using an adapter if your model supports it, then run the same test over Wi-Fi. A large gap points to your wireless setup rather than the incoming connection.
- Retest between 8 and 10 p.m.: Repeat both tests when neighbours and your own household devices peak. A result that's strong at noon and weak at night explains buffering that only appears during games and prime time shows.
- Check whether it's every channel or one channel: If every channel buffers, suspect the network or household load. If only one channel buffers, the problem more likely sits with that stream, so retry later or switch to a backup feed if your plan includes one.
- Fix placement and band: Move the Firestick away from thick walls and microwaves using the HDMI extender, and use a less crowded 5 GHz or 6 GHz band where supported. Avoid defaulting to a busy 2.4 GHz channel just because it connected first.
A 4K complaint on an HD Stick is a hardware limit. Check the model before you change anything else.
Firestick IPTV Symptoms, Causes and Fixes
| Symptom | Likely cause | Fix |
|---|---|---|
| Picture stuck at 1080p on a 4K TV | HD Firestick, or display output set to the wrong resolution | Confirm the model, then match the display output to the TV |
| Channels missing or guide empty | Playlist or program guide still loading, or a stale playlist link | Reload the program guide, wait for categories to fill, then recheck the link |
| Login fails | Mistyped credentials or all connections in use | Recheck the details, then sign out other devices to free a connection |
| Black screen after launch | HDMI port not high-speed or wrong TV input selected | Use a high-speed HDMI port and select the correct input |
| App crashes or menus slow | Outdated Firestick software or player app | Install pending updates, clear the cache, then reinstall the player |
For general faults, start with the ordinary resets before you rebuild everything. Restart the Firestick and router, clear the player's cache, reload the program guide, and install pending Firestick and app updates. Retest at the same time of day after each change so your results compare fairly. If the Firestick is wired cleanly, the TV input is right and one channel still fails while the rest stay stable, that pattern points to the feed rather than your gear.
If a fix hasn't worked after a week, or support can't reproduce the fault, collect evidence before you write again. Send the channel name, time of day, device, error message and a short screen recording with timestamps. Support can act on that far faster than on a general complaint that streaming is slow.
Checking Sports Games and Live Feed Rights
Sports drive a lot of Canadian viewing, but popularity doesn't make the rights picture simple. A long channel list can hide the key question, which is whether the specific game you want is available on a feed you're entitled to watch in Canada.
The Roku Canada sports streaming resource reported that every one of Canada's ten most-watched television broadcasts in 2025 was a sports broadcast, 52% of Canadians reportedly streamed at least one sports league, and 54% of sports streamers said they do not know which service carries the content they want. It also reported CRTC data indicating about 40% of Canadians reported watching sports on traditional TV in the previous month, compared with under 10% using online sports services. Streaming hasn't replaced broadcast rights, so don't assume a game has moved online just because it's popular.
Verify the Game Before Puck Drop
- Start with the league schedule: Find the game on the league's Canadian schedule and note the named broadcaster. That listing is your reference point, not a social media post or a channel logo in a guide.
- Confirm the Canadian carrier: Check which Canadian service carries that broadcaster's live feed. A channel name alone doesn't confirm the live rights for a particular league or event.
- Look for blackout and regional limits: Check the broadcaster's own site for blackout or regional restrictions that apply to your province or market. Regional hockey rights are the classic Canadian example where a game can be listed nationally but restricted locally.
- Confirm your package before game time: Verify whether your package includes that channel or the pay-per-view event itself. Doing this an hour ahead leaves time to fix a login or connection problem.
What a Backup Feed Can and Cannot Do
A redundant feed may reduce interruptions if one stream drops, and that's useful during a live game. It doesn't guarantee legal availability, identical commentary, accurate guide listings or uninterrupted PPV access. Treat backup feeds as a playback convenience, not as proof of rights.
Before a big game: Verify through the league first, then check the program guide, then ask the provider in writing which channel carries the broadcast.
If a game is missing, follow that order rather than scrolling categories at faceoff. You'll quickly learn whether the issue is a rights limit, a guide error or a channel that was never in your package.
Checking Terms, Connections and Canadian Provider Rules
A provider's label doesn't settle how it's treated in Canada. The Government of Canada online service regulation guidance describes regulation as applying where a service operates wholly or partly in Canada, offers public audio, visual, or audiovisual content intended to inform, enlighten, or entertain, and has control over the content, with regulation also needing to materially contribute to implementing Canada's broadcasting policy. Calling itself an app, streaming platform or IPTV service doesn't answer those questions, so check the Canadian connection and who controls the content. For the broader legal picture, see our plain-language overview of whether IPTV is legal in Canada.
Contract Points to Answer From the Provider's Own Pages
- Simultaneous connections: Count every TV, tablet and phone that might play at once, then confirm the plan allows that number.
- Plan duration and renewal: Record the term length and whether the subscription renews automatically, so a renewal date doesn't surprise you.
- Trial terms: Confirm the trial length and whether a card is needed before you start testing.
- Refund window: Note the refund period and its conditions in writing, not just a headline promise.
- Supported devices: Confirm Firestick appears on the published device list, along with any smart TV or box you also use.
- Support access: Check the support channels and hours, plus published terms of use with a named contact address.
No provider can legitimately promise uninterrupted streaming or priority network treatment for its video. Canadian net-neutrality rules require internet providers to treat data traffic equally, so performance still rests on your plan's speed, reliability and data allowance. Treat any guarantee of flawless playback as a warning sign rather than a feature.
Red Flags and Regional Checks
Walk away from sellers with no contact details, catalogue totals that change without explanation, promises of unrestricted sports access, or requests to pay outside the official site. Those are avoidable risks when you're handing over payment details.
Then do the language and region check for your own household. A Quebec home should confirm the specific French-language channels it needs by name, while an Ontario or Prairie household should verify the regional channels it expects. Don't trust a total channel count, and ask for prices in Canadian dollars on the plan page since exact figures belong there, not in a general guide.
Test Your Setup Before You Subscribe
The decision is simple. Does the service work on your Firestick, your TV and your network at the hour you watch? Rove IPTV has a Free Trial option listed on its website, so you can run the checks in this guide before you commit to a longer plan.
The walkthrough below shows the kind of device setup you'll be working through during that test.
Start on the Canadian free trial page and confirm the trial length, whether a card is needed, the refund window and available plan durations directly there and on the FAQ pages. Then run your test in order. Install the player using the setup guide, confirm the Firestick model matches the quality you expect, and run the evening sports test over Wi-Fi and, if possible, over Ethernet. Step-by-step IPTV setup instructions are provided with every subscription, backed by 24/7 customer support, and our support team is Canadian-based if you need a term explained in writing.
This short video gives you a visual reference for the setup sequence before you begin your own test.
Next, count the simultaneous connections your household needs and confirm the plan covers them. Ask support in writing about renewal, refunds and any term you can't find, and keep the reply with your subscription details.
Plan Terms to Confirm Before You Pay
| Term | What to check |
|---|---|
| Subscription length | Confirm the available durations and choose one that covers your sports season |
| Simultaneous connections | Confirm the maximum and count every screen that might play at once |
| Free trial | Confirm the length and whether a card is needed, then run your evening test inside it |
| Refund policy | Confirm the window and its conditions in writing |
| Renewal | Confirm whether payments renew automatically and set a reminder before each renewal date |
| Support | Confirm the channels and hours, then ask one setup question to test response |
| Pricing | Confirm the price in Canadian dollars, including taxes, on the plan page |
Compare prices in Canadian dollars on the plan page, then choose the option that fits your household's connections and sports season. If the evening test passes on the device that matters most, you've earned that decision with evidence rather than a sales page.
If you're ready to test IPTV on your own Firestick, TV and home network, compare the plans and trial terms with ROVE IPTV and run the evening checks from this guide before you commit. Confirm your device compatibility, count the connections your household needs, and choose the subscription length that fits the way you watch.

No Responses